Table of Contents
Установка и настройка DLNA сервера Serviio

Внимание! Версия Serviio 1.5 и выше требуют Java 8 (Как установить JRE в CentOS)
Установка Serviio в CentOS 6
Скачиваем Serviio
# wget http://download.serviio.org/releases/serviio-1.1-linux.tar.gz
Распаковываем архив в ''/opt''
# tar -C /opt -zxvf serviio-1.1-linux.tar.gz
# mv /opt/serviio-1.1 /opt/serviio
Создаём пользователя Serviio
# useradd -d /opt/serviio -r serviio
# chown -R serviio:serviio /opt/serviio
Создаём init скрипт
Создаём init скрипт /etc/init.d/serviio
#! /bin/sh
#
# chkconfig 35 85 15
# description: Start the serviio DLNA server in headless mode
### BEGIN INIT INFO
# Provides: serviio
# Required-Start: $network
# Required-Stop: $network
# Default-Start: 3 5
# Default-Stop: 0 1 2 6
# Description: Start the serviio DLNA server in headless mode
### END INIT INFO

SERVIIO_HOME="/opt/serviio"
SERVIIO_DAEMON="serviio.sh"
SERVIIO_BIN="$SERVIIO_HOME/bin/$SERVIIO_DAEMON"
SERVIIO_USER="serviio"

# Source function library.
. /etc/rc.d/init.d/functions

RETVAL=0

check() {
        # Check that we're a privileged user
        [ $(id -u) = 0 ] || exit 4

        # Check if SERVIIO_HOME exists
        test -d "$SERVIIO_HOME" || exit 5

        # Check if SERVIIO_BIN is executable
        test -x "$SERVIIO_BIN" || exit 5
}

start() {
        check
        echo -n "Starting Serviio DLNA server: "
	/bin/su --session-command="$SERVIIO_BIN -headless" $SERVIIO_USER &
        RETVAL=$?
        if [ $RETVAL -eq 0 ]; then
            touch /var/lock/subsys/serviio.sh
            echo_success
        else
            echo_failure
        fi
        echo
        return $RETVAL
}

stop() {
    check
    echo -n "Shutting down Serviio DLNA daemon: "
    # Retrieve JAVA Serviio process ID
    PIDDAEMON=`pgrep $SERVIIO_DAEMON`
    [ -z "$PIDDAEMON" ] || PIDJAVA=`ps -o pid= --ppid $PIDDAEMON`
    # Kill the daemon
    killproc "$SERVIIO_BIN"
    RETVAL=$?
    [ $RETVAL -eq 0 ] && rm -f /var/lock/subsys/serviio.sh
    echo
    # Kill the JAVA Serviio process if exists
    [ -z "$PIDJAVA" ] || kill -9 $PIDJAVA
    return $RETVAL
}

restart() {
        stop
        start
}


case "$1" in
start)
        start
        ;;
stop)
        stop
        ;;
force-reload)
        restart
        ;;
restart)
        restart
        ;;
condrestart)
        if [ -f /var/lock/subsys/serviio.sh ]; then
            restart
        fi
        ;;
status)
        status serviio.sh
        ;;
*)
        echo $"Usage: $0 {start|stop|status|restart|condrestart|force-reload}"
        RETVAL=2
esac

exit $RETVAL
Добавляем сервис в автозагрузку
# chmod +x /etc/init.d/serviio
# chkconfig --add serviio
# chkconfig serviio on
Запускаем serviio
# service serviio start
Правила для iptables
# iptables -A INPUT -p udp -m udp --dport 1900 -j ACCEPT -m comment --comment "Serviio"
# iptables -A INPUT -p tcp --dport 8895 -j ACCEPT -m comment --comment "Serviio"
# iptables -A INPUT -p tcp --dport 23423 -j ACCEPT -m comment --comment "Serviio"
# iptables -A INPUT -p tcp --dport 23424 -j ACCEPT -m comment --comment "Serviio"
Установка Serviio в CentOS 7
Перед установкой
Выключаем SELinux (да да, опять выключаем, а не изучаем, как правильно настроить. paranoid-mode = off).
# sed -i 's/enforcing/disabled/g' /etc/selinux/config /etc/selinux/config
# shutdown -r now
Устанавливаем Java
# yum install java-1.7.0-openjdk
Добавляем репозитории для ffmpeg и других важных мультимедиа пакетов
# yum -y install http://dl.fedoraproject.org/pub/epel/7/x86_64/e/epel-release-7-5.noarch.rpm
# yum -y install http://li.nux.ro/download/nux/dextop/el7/x86_64/nux-dextop-release-0-5.el7.nux.noarch.rpm
# yum -y install http://linuxdownload.adobe.com/linux/x86_64/adobe-release-x86_64-1.0-1.noarch.rpm
Устанавливаем ffmpeg
# yum install ffmpeg
Скачиваем Serviio
# wget http://download.serviio.org/releases/serviio-1.4.1.2-linux.tar.gz
# tar -C /opt -zxvf serviio-1.4.1.2-linux.tar.gz
# mv /opt/serviio-1.4.1.2 /opt/serviio
Создаём пользователя serviio
# useradd -d /opt/serviio -r serviio
# chown -R serviio:serviio /opt/serviio
# passwd serviio (спорный вопрос нужно ли устанавливать пользователю пароль. надо читать форум serviio)
Создаём новый systemd сервис
# touch /lib/systemd/system/serviio.service
[Unit]
Description=Serviio Server Daemon
After=syslog.target network.target

[Service]
User=serviio
Type=simple
ExecStart=/opt/serviio/bin/serviio.sh

[Install]
WantedBy=multi-user.target
Добавляем в автозагрузку
# systemctl daemon-reload
# systemctl enable serviio
Запускаем Serviio
# systemctl start serviio
Настройки для firewall
Создаём конфигурационный файл для фаерволла /etc/firewalld/services/serviio.xml
<?xml version="1.0" encoding="utf-8"?>
<service version="1.0">
	<short>serviio</short>
	<description>Serviio Server</description>
	<port port="8895" protocol="udp"/>
	<port port="8895" protocol="tcp"/>
	<port port="1900" protocol="udp"/>
	<port port="1900" protocol="tcp"/>
	<port port="23423" protocol="udp"/>
	<port port="23423" protocol="tcp"/>
	<port port="23424" protocol="udp"/>
	<port port="23424" protocol="tcp"/>
</service>
Активируем новые правила
# systemctl stop firewalld
# systemctl start firewalld
# firewall-cmd --permanent --zone=public --add-service=serviio
# firewall-cmd --reload
Дополнительные возможности
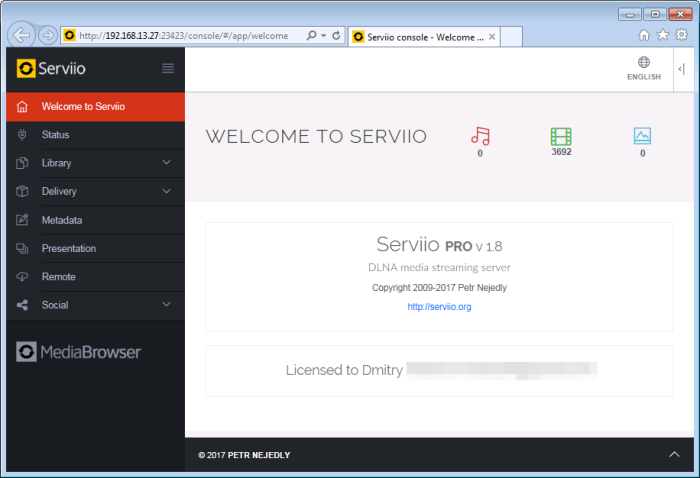
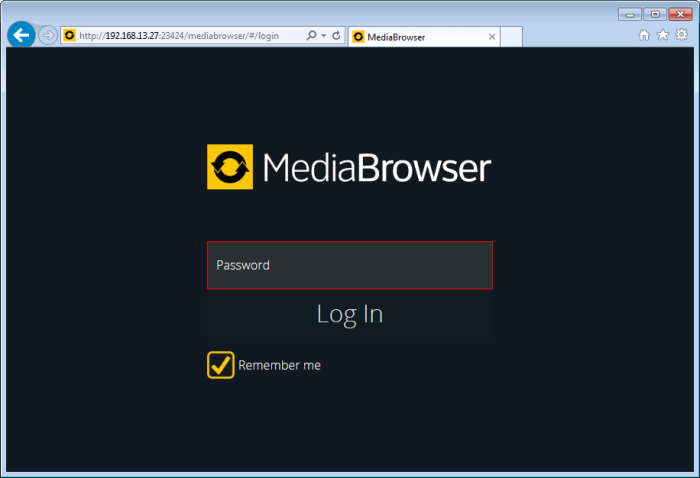
Веб-интерфейс
Ссылки выше уже не актуальны, так как Serviio теперь имеет свой собственный интерфейс для настройки.
Console - http://IP:23423/console
Mediabrowser - https://IP:23424/mediabrowser
Access Serviio Media Browser from Internet on port 80
http://wiki.serviio.org/doku.php?id=external_access_and_proxy_forward
NameVirtualHost 10.0.1.16:80
<VirtualHost 10.0.1.16:80>
 ServerName video.server.com

 ProxyPass /cds/ http://10.0.1.16:23424/cds/
 ProxyPassReverse /cds/ http://10.0.1.16:23424/cds/

 ProxyPass / http://10.0.1.16:23424/mediabrowser/
 ProxyPassReverse / http://10.0.1.16:23424/mediabrowser/

</VirtualHost>
Конфиг для nginx
Пример для nginx без SSL. Доступ к console только для примера. Открывать доступ к нему из глобальной сети имхо крайне опасно.
# Serviio mediabrowser
upstream serviiomb {
    server 192.168.13.27:23424;
}

server {
    listen 80;
    server_name media.serviio.tld;

location / {
    proxy_pass http://serviiomb/mediabrowser/;
    proxy_set_header Host $http_host;
    proxy_set_header X-Real-IP $remote_addr;
    proxy_set_header X-Forwarded-For $proxy_add_x_forwarded_for;
    proxy_set_header X-Forwarded-Proto $scheme;
    # By default we dont want redirect it
    proxy_redirect off;
    # Cache
    proxy_buffering off;
    proxy_cache off;
}

location /cds/ {
    proxy_pass http://serviiomb/cds/;
    proxy_set_header Host $http_host;
    proxy_set_header X-Real-IP $remote_addr;
    proxy_set_header X-Forwarded-For $proxy_add_x_forwarded_for;
    proxy_set_header X-Forwarded-Proto $scheme;
    # By default we dont want redirect it
    proxy_redirect off;
    # Cache
    proxy_buffering off;
    proxy_cache off;
 }
}

# Serviio console
upstream serviiocs {
    server 192.168.13.27:23423;
}

server {
    listen 80;
    server_name console.serviio.tld;

location / {
    proxy_pass http://serviiocs/console/;
    proxy_set_header Host $http_host;
    proxy_set_header X-Real-IP $remote_addr;
    proxy_set_header X-Forwarded-For $proxy_add_x_forwarded_for;
    proxy_set_header X-Forwarded-Proto $scheme;
    # By default we dont want redirect it
    proxy_redirect off;
    # Cache
    proxy_buffering off;
    proxy_cache off;
    }

location /rest/ {
    proxy_pass http://serviiocs/rest/;
    proxy_set_header Host $http_host;
    proxy_set_header X-Real-IP $remote_addr;
    proxy_set_header X-Forwarded-For $proxy_add_x_forwarded_for;
    proxy_set_header X-Forwarded-Proto $scheme;
    # By default we dont want redirect it
    proxy_redirect off;
    # Cache
    proxy_buffering off;
    proxy_cache off;
    }
}
Если не работает загрузка файла лицензии
curl -i -H "Content-Type: plain/text; Accept: application/json" -X PUT "http://127.0.0.1:23423/rest/license-upload" -T Serviio_XXX.lic
init скрипт для CentOS
Рабочий домашний конфиг nginx для Serviio
upstream serviio {
    server 127.0.0.1:23424;
}

server {
    server_name media.example.com;

    listen 443 ssl;
    listen [::]:443 ssl;

    # certs sent to the client in SERVER HELLO are concatenated in ssl_certificate
    ssl_certificate /etc/letsencrypt/live/media.example.com/fullchain.pem;
    ssl_certificate_key /etc/letsencrypt/live/media.example.com/privkey.pem;
    ssl_session_timeout 1d;
    ssl_session_cache shared:SSL:50m;
    ssl_session_tickets off;

    # Diffie-Hellman parameter for DHE ciphersuites, recommended 2048 bits
    ssl_dhparam /etc/nginx/dhparam.pem;

    # intermediate configuration. tweak to your needs.
    ssl_protocols TLSv1 TLSv1.1 TLSv1.2;
    ssl_ciphers 'ECDHE-ECDSA-CHACHA20-POLY1305:ECDHE-RSA-CHACHA20-POLY1305:ECDHE-ECDSA-AES128-GCM-SHA256:ECDHE-RSA-AES128-GCM-SHA256:ECDHE-ECDSA-AES256-GCM-SHA384:ECDHE-RSA-AES256-GCM-SHA384:DHE-RSA-AES128-GCM-SHA256:DHE-RSA-AES256-GCM-SHA384:ECDHE-ECDSA-AES128-SHA256:ECDHE-RSA-AES128-SHA256:ECDHE-ECDSA-AES128-SHA:ECDHE-RSA-AES256-SHA384:ECDHE-RSA-AES128-SHA:ECDHE-ECDSA-AES256-SHA384:ECDHE-ECDSA-AES256-SHA:ECDHE-RSA-AES256-SHA:DHE-RSA-AES128-SHA256:DHE-RSA-AES128-SHA:DHE-RSA-AES256-SHA256:DHE-RSA-AES256-SHA:ECDHE-ECDSA-DES-CBC3-SHA:ECDHE-RSA-DES-CBC3-SHA:EDH-RSA-DES-CBC3-SHA:AES128-GCM-SHA256:AES256-GCM-SHA384:AES128-SHA256:AES256-SHA256:AES128-SHA:AES256-SHA:DES-CBC3-SHA:!DSS';
    ssl_prefer_server_ciphers on;

    # HSTS (ngx_http_headers_module is required) (15768000 seconds = 6 months)
    add_header Strict-Transport-Security max-age=15768000;

    # OCSP Stapling ---
    # fetch OCSP records from URL in ssl_certificate and cache them
    ssl_stapling on;
    ssl_stapling_verify on;

    ## verify chain of trust of OCSP response using Root CA and Intermediate certs
    ssl_trusted_certificate /etc/letsencrypt/live/media.example.com/chain.pem;

    resolver 8.8.8.8;

    location / {
        root /home/user/serviio-media-browser/web;
    }

    location /cds/ {
        if ($request_method = 'OPTIONS') {
             add_header Access-Control-Allow-Origin *;
             add_header Access-Control-Allow-Credentials true;
             add_header Access-Control-Allow-Methods 'GET, POST, OPTIONS';
             add_header Access-Control-Allow-Headers 'authorization, x-serviio-date';
             return 204;
        }

        proxy_set_header Host $host;
        proxy_set_header X-Forwarded-For $proxy_add_x_forwarded_for;

        proxy_hide_header Access-Control-Allow-Origin;
        add_header Access-Control-Allow-Origin * always;

        proxy_pass http://serviio;
    }

    location ~ ^/cds/resource/.*\.m3u8$ {
        sub_filter 'http://media.example.com/cds/resource/' 'https://media.example.com/cds/resource/';
        sub_filter_once off;
        sub_filter_types application/vnd.apple.mpegurl;

        proxy_set_header Host $host;
        proxy_set_header X-Forwarded-For $proxy_add_x_forwarded_for;
        proxy_set_header Accept-Encoding '';

        proxy_pass http://serviio;
    }
}


Discussion